While dairy is definitely in a grey zone, we know that some of its constituents, like the fat (butter), contain a host of health promoting benefits.
Yogurt is another one of those foods that can offer a lot of health benefits without too many possible drawbacks. As you probably know, yogurt is milk that has been fermented by strains of lactic acid producing bacteria. For this reason, yogurt is a good source of probiotics, which are beneficial bacteria.
Apart from the satisfaction of making it yourself, homemade yogurt is much cheaper than store bought yogurt and you stay in control of the ingredients you use.
You can therefore use the best quality organic and grass-fed whole milk and even raw milk instead of the regular milk coming from improperly fed and treated cows.
Even more so, if you ferment it long enough, the bacteria will consume all the lactose, which is a type of sugar in milk that can often cause problems.
In the end, homemade yogurt is an amalgam of bacteria, fat, and proteins (casein and whey). Yet, some people might still be worried with the casein content of yogurt.
Casein is a protein found in milk that has been shown to cause problems for some people, especially combined with the immune disrupting effects of gluten.
Most of the cows raised for milk in North-America produce a milk with a type of casein called A1. Many people who reported having problems with dairy experience relief from either raw milk, goat's milk or sheep's milk. Goats and sheep produce A2 casein, which has been shown not to cause the problems that A1 causes.
Still, if you can't get raw milk, goat's milk, or sheep's milk and are worried about the casein content of yogurt, there is another alternative: sour cream. Sour cream is simply fermented cream instead of fermented milk. Cream, heavy cream that is, only contain traces of lactose and casein, while the caloric content comes from fat (butter fat).
Homemade sour cream is also a great way to get an even better dose of healthy saturated fat. Keep in mind that sour cream made with heavy cream is very rich and filling, much more so than most store bought sour cream, which is probably made from half and half cream.
The fermentation of cream will of course consume the sugars even more thoroughly than fermented milk. Crème fraiche, a French specialty, is a variation of sour cream that probably only differs in the fermentation time and strains introduced.
Keep in mind that while sour cream and yogurt are excellent for making thick and tangy sauces for your favorite Paleo dishes, they'll lose their probiotic properties when heated. Beef stroganoff is probably the most well known dish where the sauce often contains sour cream.
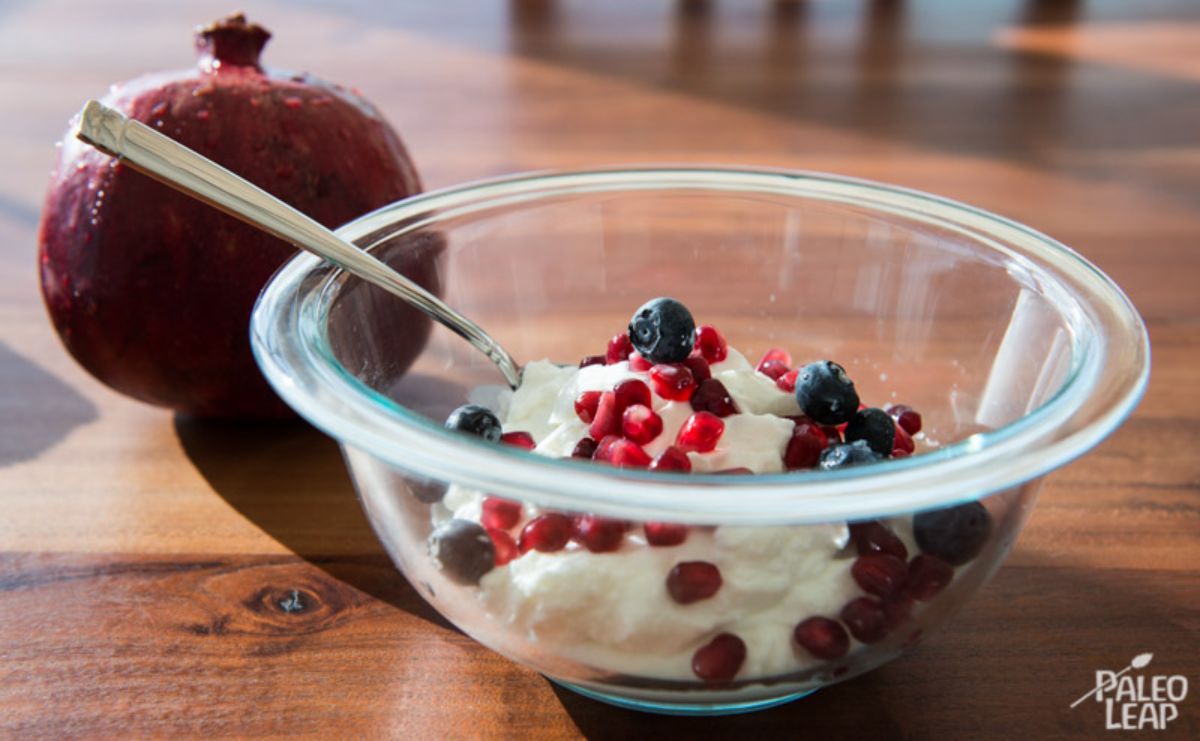
They are a very versatile addition to the diet that go well with sweet and savory dishes. Serving yogurt or sour cream flavored with your favorite fresh herbs over slices of roast beef, pork or chicken is absolutely delicious. On the sweet side, dark chocolate, mint, vanilla or berries mixed with yogurt or sour cream make for an excellent and healthy dessert. Tsadziki, the popular Greek sauce made with yogurt, cucumbers and garlic, also goes well with virtually anything.
The idea of making your own yogurt might seem a little complex, but once you get the hang of it, it all becomes pretty simple and straightforward.
You don't even need much in terms of kitchen equipment. After all, a yogurt maker is simply a device that keeps the yogurt warm during the fermentation process. I much prefer simply putting my batch in an oven with the light on, and the door closed.
It doesn't cost a thing, and you can make as much as you want. A thermometer to check the temperature of the milk or oven is nice to have handy but not mandatory.
As for ingredients, you only need good quality whole milk or cream and a bacterial starter of some kind. Yogurt starters can be bought online at places like GI Pro Health, Cultures for Health or Custom Probiotics.
Crème fraiche is often started with buttermilk, and you can even try it without a starter if you decide to use raw milk. The natural bacteria in the milk will ferment it just fine.
Another good and cheap alternative is to use a bit of leftover yogurt from your previous batch or from commercial yogurt with live bacteria. Companies that sell powder starter formulations usually advise starting with fresh starter every time, but as long as your yogurt tastes like yogurt and holds like yogurt, you can use leftover yogurt. Either way, a bottle of yogurt starter in powder form will last you for a long time because you'll use only a very small amount per batch.
Without further ado, here are the instructions for a yogurt or sour cream fermented for 24 hours, so all the lactose gets digested by the bacteria. It's my preferred way to make it because it's a simple process, and I prefer not having any lactose when I don't have to. It also produces a nice and tangy yogurt.
This is a yogurt that is SCD compliant. SCD (specific carbohydrate diet) is a diet created to treat digestive issues ranging from IBS and IBD to Crohn's and even autism. It is very similar to Paleo but differs in the sense that it focuses heavily on probiotic foods and the elimination of any form of starch.
Homemade Yogurt Recipe
Serves: 8
Ingredients
- 4 cups whole milk or cream (pastured, grass-fed or raw are the best choices);
- Powder bacterial starter or ¼ cup good quality plain yogurt with live cultures

Preparation
- Sterilize your tools beforehand by placing them in boiling water for at least ten minutes.
- Pour the milk into a heavy-bottomed pan and let it heat at a medium-low temperature making sure you often stir, so it doesn't scorch. The more fat in your milk, the less chance it will burn. You want to bring the milk to at least 180 F. Use either a thermometer making sure to stir before taking a measure, or if you don't have a thermometer, look for small bubbles that form around the edges of the pan. This process kills off any other bacteria, so the starter can have the whole place to play.
- Before introducing the starter, cool the milk to around room temperature. The fastest way to do that is to pour the heated milk into the glass jar/bottles that you'll use for the fermentation and to put those jars/bottles in a cold water bath. You can then stir the milk to make the process happen even faster. If you put the starter in milk that's too hot, you'll kill it.
- If using a powdered starter, follow their instructions for the quantity to use. I like to work in one bigger glass jar instead of smaller glass bottles because it's simpler to clean afterward. I find that the 4 cups glass measuring cups are ideal for both cooling the milk, mixing the starter, and fermenting the yogurt. If you use multiple bottles, you might want to have the cooled milk in a jar to mix in the starter so you can be more accurate about the quantity. If using leftover yogurt, prepare a paste of about ½ cup of the cooled milk with the ¼ cup of leftover yogurt. Mix this paste with the rest of the cooled milk.
- Close up the bottles or cover the jar with plastic wrap and put it in an oven with the light on. The light acts as your heating element. This is where things can get a little bit touchy because the fermentation temperature is pretty important for the success of your yogurt. The temperature inside the oven should stay around 100 to 110 F, and you can place a thermometer in the oven to know for sure. Most ovens will do just fine when simply keeping the light on. If it becomes too hot, you can open up the door just a tad. For those ovens that don't become hot enough, you can buy a stronger light bulb, like a 60w, and use it when making yogurt. You can also heat the oven to the lowest temperature (usually around 170 F) and then turn it off and reheat it when the temperature has dropped enough.
- Let the milk ferment for about 24 hours. The lactose should be completely digested within 24 hours, but you can let the fermentation go for longer without a problem.
- Place the jar or bottles in the refrigerator to cool and enjoy! You might sometimes end up with yogurt that is a bit more liquid than commercial yogurt, but often the taste won't suffer. It all depends on the quantity and strength of the starter and temperature during the fermentation process. Most of the time, though, it should come out just fine. Be aware, though, that once you take the fermented yogurt out of the oven, it will still be runny, but it will solidify as it cools.
Yogurt cheese (Labneh)
I like to make soft cheese from time to time with my finished yogurt or sour cream. Sour cream effectively becomes cream cheese, and it's absolutely delicious. Yogurt also takes the same texture as cream cheese, only tangier.
It's ridiculously easy to make. Be sure the yogurt or sour cream has cooled in the refrigerator. Line a fine colander with paper towels or layers of cheesecloth. Pour the yogurt or sour cream into the colander and then hang the colander over a pan, cover and let strain for 6 to 8 hours in the refrigerator or not.
Some people like to attach the cheesecloth with a string and make it hang over their sink. The liquid that gets strained is water with whey protein. You can discard it, but you can also keep it and drink it; whey is a good quality protein.
I hope you'll like making and enjoying this delicious fermented creation and that your gut will thank you for all those nice little buggers you feed it. Dairy might be in a grey zone on a Paleo diet, but sometimes the benefits outweigh the potential problems. It might just be the case with yogurt.
📖 Recipe

Homemade Yogurt Recipe
Ingredients
- 4 cups whole milk or cream pastured, grass-fed or raw are the best choices
- Powder bacterial starter or ¼ cup good quality plain yogurt with live cultures
Instructions
- Sterilize yours tools beforehand by placing them in boiling water for at least ten minutes.
- Pour the milk in a heavy bottomed pan and let it heat at a medium low temperature making sure you stir often so it doesn’t scorch. The more fat in your milk, the less chance it will burn. You want to bring the milk to at least 180 F. Use either a thermometer making sure to stir before taking a measure or if you don’t have a thermometer look for small bubbles that form around the edges of the pan. This process kills off any other bacteria so the starter can have to whole place to play.4 cups whole milk or cream, Powder bacterial starter or ¼ cup good quality plain yogurt with live cultures
- Before introducing the starter, cool the milk to around room temperature. The fastest way to do that is to pour the heated milk in the glass jar/bottles that you’ll use for the fermentation and to put those jar/bottles in a cold water bath. You can then stir the milk to make the process happen even faster. If you put the starter in milk that’s too hot, you’ll kill it.
- If using a powdered starter, follow their instructions as for the quantity to use. I like to work in one bigger glass jar instead of smaller glass bottles because it’s simpler to clean afterwards. I find that the 4 cups glass measuring cups are ideal for both cooling the milk, mixing the starter and fermenting the yogurt. If you use multiple bottles, you might want to have the cooled milk in a jar to mix-in the starter so you can be more accurate about the quantity. If using leftover yogurt, prepare a paste of about ½ cup of the cooled milk with the ¼ cup leftover yogurt. Mix-in this paste to the rest of the cooled milk.
- Close up the bottles or cover the jar with plastic wrap and put it in an oven with the light on. The light acts as your heating element. This is where things can get a little bit touchy because the fermentation temperature is pretty important for the success of your yogurt. The temperature inside the oven should stay around 100 to 110 F and you can place a thermometer in the oven to know for sure. Most ovens will do just fine when simply keeping the light on. If it becomes too hot, you can open up the door just a tad. For those ovens that don’t become hot enough, you can buy a stronger light bulb, like a 60w, and use it when making yogurt. You can also heat the oven to the lowest temperature (usually around 170 F) and then turn it off and reheat it when the temperature has dropped enough.
- Let the milk ferment for about 24 hours. The lactose should be completely digested by 24 hours, but you can let the fermentation go for longer without problem.
- Place the jar or bottles in the refrigerator to cool and enjoy! You might sometimes end-up with a yogurt that is a bit more liquid than commercial yogurt, but often the taste won’t suffer. It all depends on the quantity and strength of the starter and temperature during the fermentation process. Most of the time though, it should come out just fine. Be aware though that once you take the fermented yogurt out of the oven it will still be runny, bit it will solidify as it cools.


Leave a Reply